

Laying your own mosaic tiles doesn't start with adhesive or a tile mat—it starts with a good plan. If you want to lay mosaic tiles yourself, it's important not to just jump in. The choices you make before you lay a single tile largely determine how smooth and beautiful the final result will be.
In this article, we'll guide you through the practical preparation process: from choosing the right mosaic tile to designing a laying plan. Because if you handle these steps correctly, laying your own mosaic tiles will not only be easier but also more enjoyable.
Why laying mosaic tiles yourself is a good idea
Laying your own mosaic tiles means more than just saving money. It's a way to incorporate your own style, taste, and character into your interior. Instead of choosing a standard tiled wall or floor, you decide how your mosaic will look. You have complete creative freedom: combining colors, varying shapes, designing patterns… it's all in your hands.
Creative freedom and personal style
One of the biggest advantages of laying your own mosaic tiles is that you're in complete control. You don't have to settle for what's available in stores or what a tiler offers. You choose whether you want a sleek geometric pattern or a playful design with different colors and shapes. With mosaic tile installation, it's all possible. Laying mosaic tiles yourself gives you the freedom to personalize a space. You can make it exactly how you envision it. And because mosaic tiles are often small, you can work with shapes and colors down to the millimeter.
Save on labor costs
Another practical advantage of laying mosaic tiles yourself is the significant savings on labor costs. Tilers often charge a hefty hourly rate, especially for detailed work like mosaic. By doing it yourself, you not only save on these costs but also learn a valuable skill. This saving also gives you the freedom to invest in higher-quality materials. Instead of compromising on the quality of the tiles, you can spend a little extra on something special with the same budget. For example, handmade mosaic tiles or natural stone varieties.
Pride and satisfaction
Perhaps the most rewarding aspect of laying mosaic tiles yourself is the sense of pride when your project is complete. Every time you see that wall or floor, you know: I made this myself. And that makes all the difference. You've created something tangible, with your own hands and ideas. You don't get that feeling when you let someone else do the work. You also learn a lot during the process: about materials, techniques, correcting mistakes, and planning ahead. This makes laying mosaic tiles yourself not just a chore, but also a learning experience that will benefit you on future projects.
Choosing the right mosaic tiles for your project
The first step in laying mosaic tiles yourself is perhaps the most fun: choosing the right tiles. However, it's more than just looking at the tiles. Each type of mosaic tile has specific properties that determine its suitability for your space and application. When laying mosaic tiles yourself, you can choose from various materials:
- Glass mosaic : glossy, colourful and perfect for decorative applications or damp areas such as the bathroom.
- Ceramic mosaic tiles : durable, easy to clean and ideal for floors or kitchens.
- Natural stone mosaic : provides a robust, natural look. Think marble or slate – perfect for a luxurious look.
- Handmade or vintage mosaic : unique tiles that give your project a traditional look.
Laying your own mosaic tiles starts with choosing tiles that are not only beautiful but also suit the space's intended use. Not every mosaic tile is suitable for every location. Therefore, keep in mind:
- Anti-slip value – especially important for floors in wet areas.
- Colour retention – some cheap glass tiles can fade in bright sunlight.
- Wear resistance – for busy floors, choose tiles with a high hardness.
- Pattern repeat – how often does the pattern repeat? Add variation if you want a natural effect.
At Mozaïektegel.com you will find an extensive range of mosaic tiles and related products from renowned brands such as The Mosaic Factory, Stone Line, Stabigio, Terre d'Azur, Serenissima, DTG, JOS, Mapei, Vilar Albaro, Differenz, Ragno, Coba, Colorker, Atlas Concorde, and Beste Koop. You can come to us for stylish wall tiles and floor tiles , as well as convenient solutions for applying stickers to tiles. or professional processing tools You can count on high-quality workmanship that perfectly matches your interior or renovation project.
We collaborate with a number of reliable and passionate partners , including Deurbeslag -expert, Van Boxtel Interieurbouw, Tegen de Wand, MuurWerken, Whiteboard-expert.nl, geWOONSTIJL, LIONSHOME, and Wecho. Thanks to these partnerships, we can offer you not only high-quality products but also complete and well-thought-out solutions for every interior design project.
Materials required for laying mosaic tiles yourself
Before you can start laying mosaic tiles yourself, you'll need the right materials and tools. Good preparation makes the difference between frustration and a smooth project. To lay mosaic tiles yourself, you'll need:
- Tile adhesive – choose the right adhesive for your substrate (powder adhesive for wet areas, paste adhesive for dry areas).
- Glue comb – to apply the glue evenly.
- Grout – choose the right color and pay attention to water resistance.
- Tile cutter or mosaic pliers – for cutting tiles to size.
- Sponge and bucket – for cleaning up excess grout.
- Spirit level and tape measure – for aligning your design.
- Gloves, knee pads and safety glasses – for your own comfort and safety.
Laying your own mosaic tiles becomes even easier with tools like a mixing paddle for your drill to evenly mix powdered adhesive, a trowel for precise application of adhesive or grout, spacers to keep the joint width consistent, and masking tape to mark off the edges of the design. It's important to choose quality. Good tools last longer and work more precisely.
Preparing the surface for mosaic tiles
A flat, clean surface is the foundation of every successful project. When laying mosaic tiles yourself, the better your preparation, the more beautiful and durable the final result. Depending on the surface, several steps are required:
- Concrete or cement screed – remove dust and level if necessary.
- Existing tiles – clean thoroughly, sand lightly, and apply primer for adhesion if necessary.
- Plasterboard or MDF wall – first make it moisture-resistant with a suitable primer.
- Wooden subfloor – not ideal unless reinforced with cement-bonded boards or underlayment.
Laying mosaic tiles yourself on a poor surface often leads to loose tiles, cracks or discoloured grout.
When laying mosaic tiles yourself, using a primer is essential. This ensures good adhesion between the substrate and the adhesive. Especially on porous surfaces, this prevents the adhesive from hardening too quickly. Uneven surfaces require leveling first. Small indentations or misalignments can result in uneven mosaic tiles. Use a leveling compound for floors or wall filler for walls.
Determining and aligning the design

Laying your own mosaic tiles isn't just about technique; it's also about creativity. Your design determines the look of the room—and proper alignment prevents crooked lines or unwanted surprises. Before you lay the first tile, a laying plan is essential. Carefully measure your surface, draw it out, and determine where to begin. When laying your own mosaic tiles, you usually start in a visible corner or in the center, depending on the pattern.
Try out your design first with a few mats without adhesive. This way, you can see how the pattern flows, whether you have enough tiles, and where to cut. Laying your own mosaic tiles becomes more predictable and neater. Pay attention to symmetry: does the pattern repeat logically? With mosaic tiles, you'll immediately see if something's off. Ensure visual balance, especially in smaller spaces. Laying your own mosaic tiles is also a bit of a puzzle. Use a spirit level, chalk line, or laser line to lay your first rows perfectly straight. The rest will follow automatically. A crooked base makes everything difficult to correct afterward. Laying your own mosaic tiles means working precisely from the start.
Laying mosaic tiles yourself with the right tile adhesive
Laying your own mosaic tiles starts with the basics: good adhesive. Without a strong and suitable tile adhesive, your mosaic won't last long. And with mosaic tiles, precision is especially important. They're light, small, and prone to shifting. You basically have a choice between paste adhesive and powder adhesive:
- Paste adhesive is ready-to-use and ideal for smaller surfaces or vertical applications such as walls. This adhesive is useful for laying mosaic tiles yourself in the kitchen or bathroom.
- Powder adhesive requires mixing with water and is stronger. It's ideal for floors or larger surfaces. It provides extra adhesion, especially when working with heavier materials like natural stone.
When buying adhesive, always check whether it's suitable for mosaic tiles. There are adhesives specifically designed for fine tiles, ensuring minimal buildup and maximum grip.
The importance of the right glue comb
For a smooth result when laying mosaic tiles yourself, use a fine-toothed comb. The comb ensures that the adhesive is evenly distributed over the substrate. This ensures that all the tiles are level, which is essential for a neat finish. When laying mosaic tiles yourself, choose a comb with 3 to 4 mm teeth. Larger teeth apply too much adhesive, which can cause it to rise between the joints. This makes grouting more difficult and less attractive later on.
Cut and size your own mosaic tiles
When laying mosaic tiles yourself, you'll inevitably encounter situations where the tiles don't fit perfectly. Think of edges, corners, or recesses around electrical outlets or pipes. To achieve a truly flawless finish, you'll need to cut the mosaic tiles yourself.
Laying mosaic tiles yourself requires custom work. While many mosaic tiles are supplied in mats, the size almost never fits your wall or floor perfectly. Sometimes you want to adjust a specific pattern or add a creative twist to the edging. Proficient cutting skills are therefore essential for a professional result. When laying mosaic tiles yourself, you can use various tools to cut the tiles to size, depending on the material:
- Glass mosaic: Use mosaic pliers or glass-breaking pliers. These allow you to break the glass along a scribed line or cut off individual tiles.
- Ceramic mosaic: A tile cutter or tile snip with a snap-off mechanism is ideal. For small adjustments, you can use pliers.
- Natural stone mosaic: Use a wet tile saw or angle grinder with a diamond blade. This prevents cracking and ensures a smooth cut.
Laying mosaic tiles yourself also means paying attention to the finishing. The edges of cut pieces can sometimes be sharp or rough. Lightly sand these with a diamond file or sanding block for a safe and neat finish. Are you working against an open edge, such as along a wall? Consider using a profile strip or a finishing molding for a neat and secure finish.
Laying the mosaic tiles: step by step
Now the real work begins: laying your own mosaic tiles. This is where your preparation comes to life. Good preparation ensures that the installation itself goes smoothly and stress-free.
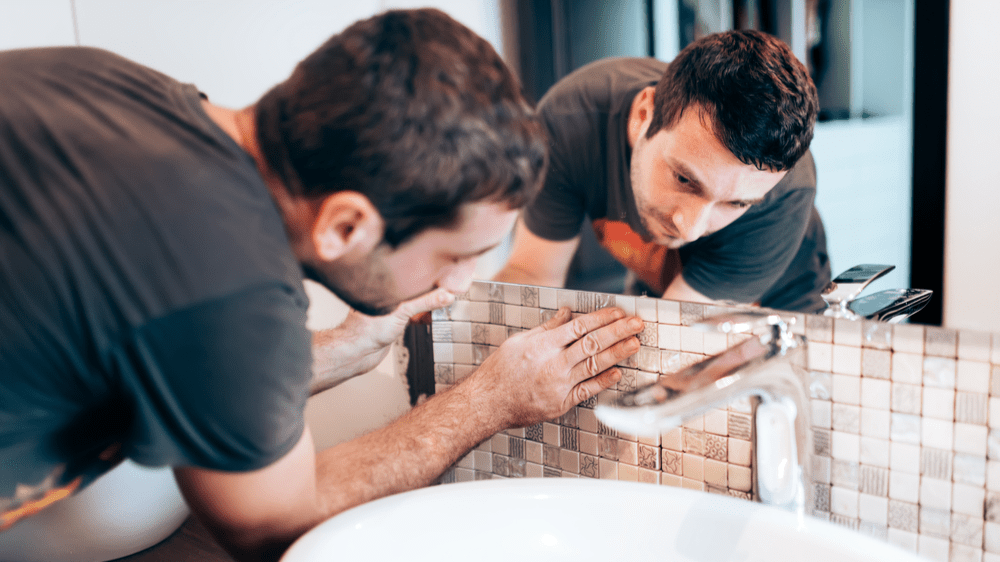
Step 1: Start in a visible corner
When laying mosaic tiles yourself, ideally start in a clearly visible corner. Think of the edge of a wall behind a sink, or the center of a floor if you want to emphasize symmetry. Draw a guideline with a spirit level or laser to ensure you start straight.
Step 2: Apply glue
Apply the tile adhesive evenly to the substrate using the notched side of the trowel. When laying mosaic tiles yourself, even adhesive distribution is crucial.
Step 3: Laying and pressing the mats
Place the mosaic tiles according to your layout plan. Press them gently but firmly into the adhesive. If necessary, use a rubber trowel or a piece of flat wood to press them down evenly. Make sure the tiles are evenly spaced and that no adhesive seeps through the joints.
Regularly check your lines with a spirit level to ensure they're still straight. When laying mosaic tiles yourself, the more often you check, the neater the final result.
Step 4: Adjustments during installation
When you reach an edge, curve, or obstacle, it's time to cut or move loose tiles. Because the mosaic is laid on mats, you can easily cut and adjust pieces. Use spacers or small wedges to maintain even joint widths, especially with handmade or uneven mosaics.
Step 5: Let the glue harden
Once everything is in place, let the tile adhesive dry thoroughly. How long this takes depends on the type of adhesive you use (paste adhesive often dries faster than powder adhesive). Always check the packaging for the exact drying time. During this time, leave the tile untouched! When laying mosaic tiles yourself, patience is often the key to success.
Want to be sure you make the right choice for your tiling project? Our team at Mozaïektegel.com is ready to help you. Feel free to contact us for free, personalized advice. We're happy to help you find the perfect mosaic tiles and ensure the entire process runs smoothly and hassle-free, from your first question to final installation.
Laying mosaic tiles yourself in damp areas
Moisture is the biggest enemy of tiling. If mosaic tiles are installed incorrectly, water can seep behind them, leading to mold, loose tiles, or damaged walls. Installing mosaic tiles yourself also means ensuring a waterproof base. Before you start laying mosaic tiles yourself in a damp room, your subfloor must be completely waterproof. Use:
- Waterproof primer (especially for wet areas)
- Sealing paste or foil on walls and floors
- Waterproof tape in corners, seams and edges
Note: Plasterboard must also be suitable for wet areas (green boards or cement-based). Laying mosaic tiles yourself on the wrong substrate can quickly lead to loose tiles or mold growth.
Not every mosaic tile is suitable for wet areas. So choose wisely. When laying mosaic tiles yourself in damp areas, these are good options:
- Glass mosaic : water-resistant and easy to clean
- Ceramic mosaic : strong and moisture resistant
- Natural stone with sealer : beautiful, but make sure you impregnate it
The grout must also be moisture-resistant. When laying mosaic tiles yourself in damp areas, use:
- Water-repellent grout
- Antifungal variant
- Flexible variant for rooms with temperature fluctuations
For showers or floors, many professionals recommend epoxy grout – a bit more difficult to work with, but extremely durable. Laying mosaic tiles yourself doesn't end with the grout. You also need to seal seams, cracks, and connections. Use silicone sealant along edges, corners, and transitions to plumbing fixtures, and check regularly for leaks or loose sealant.
Common mistakes when laying mosaic tiles yourself
Laying mosaic tiles yourself is fun and challenging, but there are also pitfalls. Fortunately, most mistakes are easy to avoid.
Wanting to work too fast
A common mistake when laying mosaic tiles yourself is rushing. Beginners, in particular, tend to rush the gluing, laying, and grouting. But haste leads to sloppy lines, poor adhesion, and an uneven finish. So always take your time, even if it seems like a simple project.
Using the wrong tile adhesive
When laying mosaic tiles yourself, the choice of tile adhesive is crucial. Paste adhesive, for example, is not suitable for damp areas, and powder adhesive must be thoroughly mixed for optimal adhesion. Always check the type of substrate and the room you're working in.
Do not draw lines
Another mistake: just starting somewhere without a plan. Laying mosaic tiles yourself without proper alignment quickly leads to uneven patterns or awkward transitions. Use a spirit level, draw guidelines, and test your laying plan with a few loose mats.
Wrong cutting
Laying your own mosaic tiles also involves cutting. But many people use the wrong tools or don't practice first. The result: broken tiles or frayed edges. Always practice on scrap material first and use the correct cutting pliers or cutter.
Adding too quickly
A common mistake when laying mosaic tiles yourself is grouting while the adhesive is still wet. This leads to shifting tiles and a messy finish. Always wait at least 24 hours – or longer, if the adhesive manufacturer specifies.
Curious about how to lay mosaic tiles yourself? Our knowledge base offers comprehensive information, practical tips, and helpful insights to help you make the right decisions. Be sure to also check out our frequently asked questions. If you're looking for quick answers to specific questions, you'll always be well prepared.
Maintenance after laying mosaic tiles yourself

Laying mosaic tiles yourself is one thing, but afterward, you naturally want to keep your work beautiful. Proper maintenance ensures that your tiles last for years without becoming dull or damaged. Laying mosaic tiles yourself requires aftercare. Use gentle cleaning agents, not harsh acids or abrasives. Glass mosaic, in particular, stays beautiful with mild soap and a soft cloth. When laying mosaic tiles yourself, the grout lines are often the most vulnerable. Protect them by occasionally applying a sealant – especially in damp areas or outdoors. This prevents mold and discoloration.
A loose tile? No problem. Laying mosaic tiles yourself also means you're willing to tackle minor repairs. Carefully remove the damaged tile, clean the surface, and lay a new one. Laying mosaic tiles on furniture or floors? Be careful not to drop heavy objects, especially on glass. If necessary, use protective caps or mats on frequently used surfaces.
Want to buy top-quality mosaic tiles?
You've now read everything you need to know about laying mosaic tiles yourself. From preparation to maintenance, from choosing the right tile to creative applications: you're ready to get started. Laying mosaic tiles yourself is more than just a job. It's a way to create something unique, with your own hands. Something that's not only beautiful, but also personal and sustainable. So grab those tiles, make a plan, and get started. And remember: mistakes are allowed; the end result is what counts. At Mozaïektegel.com, we're happy to help you with tips, materials, and personal guidance. So you can confidently and proudly say: I did this myself.
Business customers can register at Mozaïktegel.com Register for free and enjoy attractive benefits, such as sharp discounts, extra service, and fast delivery. We offer a wide range of high-quality products and make it easy to order tile samples. of almost our entire selection. This way, you can take your time to explore the materials before making a final decision.
Curious what our tiles look like in real life? Visit our showroom in Volkel and discover a wide selection that will provide plenty of inspiration for your business project. We're open Monday through Friday from 8:00 AM to 8:00 PM, and Saturdays from 9:00 AM to 3:30 PM. For questions or personalized advice, feel free to contact us – we're happy to help, without any obligation.


